Canning cheese is an age-old process that effectively extends the shelf life of your favorite block of cheddar, camembert, or brie. Essentially, canning cheese comprises of sealing cheese in an airtight container, typically a jar, and then heating it to kill off any bacteria that could lead to spoilage.
Canning is particularly beneficial for those who find themselves with an excess of cheese that can’t be consumed immediately. It also provides delicious cheese flavors available at your convenience, even during off-seasons when certain types of cheeses might not be readily available.
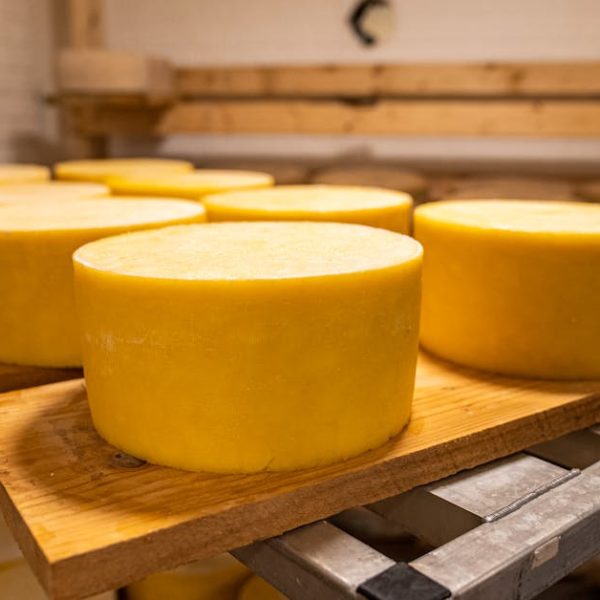
It should be noted that not all cheeses are suited for canning. Firm cheeses such as cheddar, Swiss, Colby, and Monterey Jack fare much better than soft, creamy cheeses. Choose wisely and your canned cheese could last up to several years without refrigeration.
Pro tip: Canning extends your cheese’s shelf life and allows you to enjoy delectable cheese even after months of storage.
Necessary Equipment and Ingredients for Canning Cheese
Diving into canning cheese requires several key items. Firstly, you will need clean, glass pint jars with matching lids and rings. A large pot with a lid serves as your canner, where the jars will undergo processing.
A jar lifter will protect your hands from scalds when handling hot jars, and a funnel aids in filling jars without mess. Cheese wax will be necessary to coat your cheese before canning, insulating it from potential external contaminants.
Maintaining your canning equipment in good working condition is critical. This can involve regular cleaning and proper storage of equipment when not in use.
Checklist:
- clean glass pint jars with lids and rings.
- large pot (canner) with lid.
- jar lifter.
- funnel.
- cheese wax.
Step-by-Step Guide to Canning Cheese
Canning cheese is a multistep endeavor. Begin by cutting your cheese into manageable blocks that fit into your jars. Melt cheese wax and dip each cheese block, ensuring an even coat. Place the waxed cheese into your jar and seal the jar with its lid.
Processing the jars can be done through water bath canning or pressure canning. The former involves placing the jars in a large pot of boiling water, while the latter uses a specialized pressure canner. Both methods have their advantages, with one key difference being the temperature each method yields – pressure canning can achieve higher temperatures.
Pro tip: Always ensure your jars are sealed well to prevent your hard work from becoming spoilage.
Dos and Don’ts of Canning Cheese
This cheese preservation journey isn’t without its pitfalls. Always make sure to properly clean all your equipment before beginning the process. Using excessively soft or fresh cheese can lead to failure – opt instead for hard, aged cheeses.
Irregularities in temperature or unclean sealing can lead to spoilage, so pay close attention to these elements.
Pro tip: To maintain the best taste and texture of your canned cheese, always store it in a cool, dark place.
Troubleshooting Common Canning Cheese Issues
Canning cheese isn’t always a smooth process and you may encounter some difficulties along the way. If your cheese develops an odd odor or strange color, it’s likely that the cheese has spoiled. This might be due to improper sealing or uneven heating during the canning process.
Additionally, if your canned cheese has a gritty texture, it may mean that the cheese wax has not fully melted before being applied to the cheese block.
When it comes to troubleshooting or preventing these issues, patience is key. Ensure your jars are sealed properly and your cheese is being heated at the right temperature. When melting the cheese wax, make sure it’s completely melted down to avoid a gritty texture.
Pro tip: Patience and precise temperature control can turn an initial cheese canning failure into a successful endeavor.
Checklist:
- No odd odor or strange color in the cheese: check your seal and heating process.
- Cheese does not have a gritty texture: make sure your cheese wax is fully melted before application.
In Conclusion
Once you’ve grasped the art of canning cheese, it can be a fantastic way to make the most of your cheese and extend its shelf life. Especially if you’re a cheese lover, being able to stash your favorite type of cheese away for a rainy day or to enjoy during off-seasons can be incredibly satisfying.
Remember the dos and don’ts, follow the step-by-step guide and handle any issues that occur with patience and care. Happy canning!
Key Takeaway:
- Canning cheese is an age-old process that allows you to prolong the shelf life of your favorite cheeses.
- Not all types of cheeses are ideal for canning, with firm cheeses such as cheddar, Swiss, Colby, and Monterey Jack being better suited to this method.
- A checklist of necessary canning equipment and ingredients includes clean glass pint jars with matching lids and rings, a large pot with a lid, a jar lifter, a funnel, and cheese wax.
- The cheese canning process involves coating your cheese with cheese wax, sealing it in a jar, and processing the jars through either water bath canning or pressure canning.
- There are certain dos and don’ts in cheese canning, including cleaning all your equipment beforehand and opting for hard, aged cheeses instead of soft or fresh ones.
- In case of any issues, remember to have patience and ensure that the jars are sealed properly and that the cheese is being heated at the right temperature.
Canning cheese can be quite a rewarding experience, especially for cheese lovers. It allows you to enjoy your favorite cheese anytime and also saves you money in the long run. Remember to follow the guidelines closely, take your time, and you can look forward to having delicious canned cheese in your pantry whenever you want.
FAQs
Q: Can I use any type of cheese for canning?
A: No, not all types of cheese are suited for canning. Hard, firm cheeses such as cheddar, Swiss, Colby, and Monterey Jack are better for this method.
Q: Why is it necessary to melt cheese wax before sealing my cheese in a jar?
A: Cheese wax acts as a barrier against potential external contaminants. Melting it ensures an even coat on your cheese block.
Q: What is the difference between water bath canning and pressure canning?
A: The key difference lies in the temperature each method achieves. Pressure canning can reach higher temperatures compared to water bath canning.
Q: My canned cheese developed an odd odor. What could be wrong?
A: The odd odor could be a sign of spoilage due to improper sealing or uneven heating during the canning process.
Q: Can I store canned cheese at room temperature?
A: Yes, a properly canned cheese can be stored at room temperature, but it’s better to keep it in a cool, dark place for optimal flavor and freshness.
Remember, you can learn more by exploring further articles on our website and don’t hesitate to share this informative content with others who may be interested in canning cheese.